
3D Tutorial 1: Simple Shapes
Welcome to the first of our tutorials on 3D projects!
Strap yourself in for quite the read! There's lots of information here which must be explained clearly, but once it's out of the way we can start throwing 3D objects around the screen like there's no tomorrow!
Before we get started, let's refresh a couple of important things.
X and Y
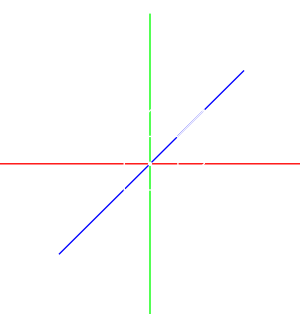
Below is a picture of an x and y axis. Seem familiar?
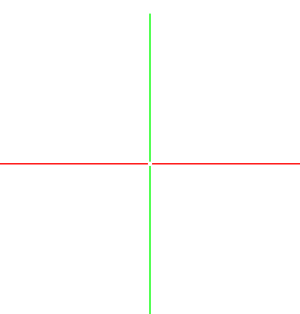
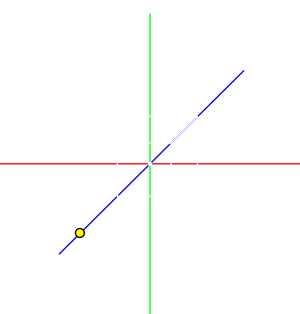
Imagine we have the number 0 sat right in the middle of our axes, where the little white dot is.
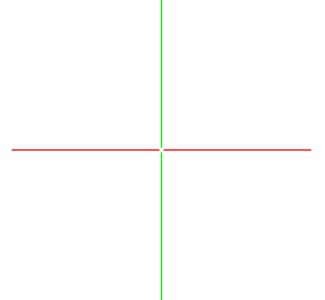
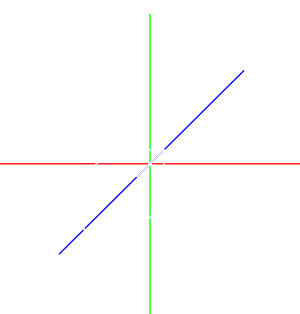
If we move along either axis, away from the centre point of 0, we will either be increasing or decreasing along one of them. Take a look below to see what we mean!
Happy with that? Excellent.
Z
Let's throw another axis in there for a total of 3 Dimensions. We call this axis z.
This line brings us into 3D space. It behaves just like our x and y axes - you can still increase and decrease your position:
Take a look at the cube below sitting nicely in our 3D space to picture the z axis properly.
Let's say I want to increase the z position of our cube. That would look something like this:
See how our cube has moved along the z axis? Almost as if it has gotten closer to us.
It's important to remember that in 3D space, things are a little different than 2D.
We must always think about the position of the camera. Depending on where our camera is, we might see the x, y and z axes very differently!
Way of the Cube
Time for some programming.
Let's create a simple program to make a single cube appear in 3D space.
Type (or copy and paste) the following code into the FUZE4 Nintendo Switch editor.
  1. obj = placeObject( cube, { 0, 0, 0 }, { 1, 1, 1 } )
  2. setObjectMaterial( obj, red, 1, 1 )
  3. setCamera( { 0, 0, 10 }, { 0, 0, 0 } )
  4.
  5. loop
  6.     clear()
  7.     drawObjects()
  8.     update()
  9. repeat
When you run this program, don't be shocked! You won't see a cube at all. In fact, you'll see a square.
There is a very good reason for this, but before we jump right in and explain why, let's talk about these exciting new functions we're using.
placeObject()
1. obj = placeObject( cube, { 0, 0, 0 }, { 1, 1, 1 } )Line 1 defines a variable called obj (short for object). In this variable we are storing a shape created by the placeObject() function.
The first argument in the placeObject() function is the type of object. FUZE4 Nintendo Switch knows a few basic 3D shapes by name. We have cube, sphere, pyramid, cone, cylinder, wedge and hemisphere.
For now, we'll keep things simple and use a cube.
The second argument in placeObject() is a vector which describes the position of our object. We want our cube to appear at 0 on the x axis, 0 on the y axis and 0 on the z axis. In other words, right in the middle of our 3D world space. Change these numbers to change the location of our cube! See what happens when you change each of the numbers in the vector.
Lastly, we have a vector to set the scale of our object on all 3 axes. We want our cube to be a sensible size and the same size in all directions, so we are using the number 1 for each element of the vector. Try changing these numbers to change the dimensions of our cube!
setObjectMaterial()
2. setObjectMaterial( obj, red, 1, 1 )Line 2 sets the material our object is made from. This will change the way light behaves on the surface of the object.
The first argument in the setObjectMaterial() function is the variable which stores the object we are configuring. We're configuring our cube, which is stored in the obj variable.
The second argument is the colour we want our object to be. We can either use a colour name here, or an RGBA (red, green, blue, alpha) vector.
The third argument is a boolean value (either true or false) for metal or non-metal.
Finally, our last argument is roughness. This value can be anything between 0 and 1, where 0 is totally smooth and very shiny, and 1 is full roughness, which makes the light appear smoother.
setCamera()
3. setCamera( { 0, 0, 10 }, { 0, 0, 0 } )Without a camera, we won't be able to see anything!
The setCamera() function contains two arguments. Our first argument is a vector which sets the position of the camera in 3D world space.
Notice that our camera is positioned at 0 on the x axis, 0 on the y axis and 10 on the z. What does this mean? Take a look at the diagram below:
In FUZE4 Nintendo Switch, when working in 3D space, each unit of 1 represents 1 meter. By placing our camera at {0, 0, 10} we put it at 10 meters positive on the z axis.
The second argument is the position in 3D space the camera is pointing at. We want our camera looking right at our cube which is positioned right in the centre of world space at {0, 0, 0}, so we're using that!
Okay! We've got the tough parts out of the way.
drawObjects()
  5. loop
  6.     clear()
  7.     drawObjects()
  8.     update()
  9. repeat
The main loop of our code is a simple clear() and update() with only one function call.
We use the drawObjects() function to prepare our 3D world to be sent to the screen, and the update() function actually sends all of this to the screen for us to see!
Well done. That was a lot to take in, but now you're equipped to move on.
So have you figured out why we only see a square?
The reason is that we are looking at our cube directly from the front!
So let's change that!
Change the setCamera() line in your code so it looks like this:
3. setCamera( { 0, 5, 10 }, { 0, 0, 0 } )Notice all we have done is changed the y element of the position vector to 5 instead of 0. This will move the camera upwards on the y axis by 5 metres.
Run the program to see our cube take form.
See you in the next tutorial! We'll shed some light on the situation.
Functions and Keywords used in this Tutorial
clear(), drawObjects(), loop, placeObject(), repeat, setObjectMaterial(), setCamera(), update()