
3D Tutorial 2: Simple Lighting
In this tutorial we'll be using the same project as the previous lesson only with an extra line.
When we begin adding light to the 3D world space, things really start to take shape.
There are four functions in FUZE4 Nintendo Switch which we can use to add light. These are:
setAmbientLight(), worldLight(), spotLight() and pointLight().
We will be using pointLight() to start with, as it's a nice and simple one to understand.
Type, or copy and paste the following code into the FUZE4 Nintendo Switch code editor.
  1. obj = placeObject( cube, { 0, 0, 0 }, { 1, 1, 1 } )
  2. setObjectMaterial( obj, red, 1, 1 )
  3. setCamera( { 0, 0, 10 }, { 0, 0, 0 } )
  4. pointLight( { 0, 4, 0 }, white, 100 )
  5.
  6. loop
  7.     clear()
  8.     drawObjects()
  9.     update()
 10. repeat
As you can see, the project is exactly the same but with one extra line. Here's the line we're talking about:
4. pointLight( { 0, 4, 0 }, white, 100 )pointLight()
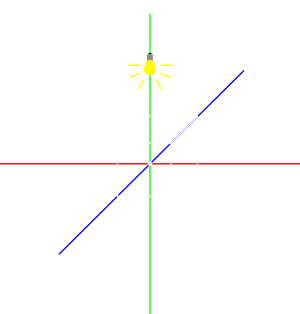
pointLight() creates a pinpoint light in a position, which radiates outward in all directions.
Think of it like a lightbulb!
Let's take a look at those arguments. The first one should be familiar to you by now! This is a vector to describe the position of the light in 3D world space.
Notice that the y element of the vector is set at 4. With the camera set the way it currently is, this means our light is positioned above the cube on the y axis.
Take a quick look at the diagram below:
When you run the program, you should see a nice lit surface to the top face of the cube, with the front face slightly darker.
The second argument is of course the colour of our light. Nice and simple! This can either be a name of a colour, or an RGBA vector
Finally, we have the light intensity. We have set this to 100 for quite a bright light with a strong effect.
Let's try moving the light around a little to see the effects.
Change your pointLight() line to look like this:
4. pointLight( { 8, 4, 0 }, white, 200 )Notice we have changed the x element of the position vector to 8, meaning that from where our camera is looking, we should see the cube illuminated from the right.
See? Let's try it from the left, by the same amount:
4. pointLight( { -8, 4, 0 }, white, 200 )Remember, the centre of the 3D world space is at {0, 0, 0}, so we must use a negative number if we want to move the light to the left.
To really visualise what's happening here, let's add some Joy-Con control to the position of the light on the x axis.
We'll need to make a couple of changes to do this. In order to change the position of our light during the loop, we must use a new function called setLightPos(). We must also use a variable to store the position of the light on the x axis, which we'll call x. Then it's just a couple of simple if statements to change the x variable and we'll be done!
Edit your code, or copy and paste the following into the FUZE4 Nintendo Switch code editor.
  1. obj = placeObject( cube, { 0, 0, 0 }, { 1, 1, 1 } )
  2. setObjectMaterial( obj, red, 1, 1 )
  3. setCamera( { 0, 0, 10 }, { 0, 0, 0 } )
  4. light = pointLight( { 0, 4, 2 }, white, 100 )
  5. x = 0
  6.
  7. loop
  8.     clear()
  9.     j = controls( 0 )
 10.     setLightPos( light, { x, 4, 2 } )
 11.     if j.left then
 11.         x -= 0.2
 12.     endif
 13.     if j.right then
 14.         x += 0.2
 15.     endif
 16.     drawObjects()
 17.     printat( 0, 0, x )
 18.     update()
 19. repeat
Let's take a quick look at that new function. First, check out the difference on line 4.
4. light = pointLight( { 0, 4, 2 }, white, 100 )We are now using a variable to store our light. We've named this variable light for obvious reasons!
Now we have a variable for our light, we can use this in the setLightPos() function.
10. setLightPos( light, { x, 4, 2 } )As you can see, the first argument is the variable name of the light we want to move.
The second argument is a vector to describe the new position of our light.
Notice we have used the variable x in the x axis element of the vector because we want this to change during the loop.
We have also increased the position of our light on the z axis, moving the light slightly closer to the camera. This will make the effect of the light more visible, as it will also hit the front face of the cube.
Finally, line 17 is a printAt() function to show us the value of our x variable.
Using the information in this tutorial, can you add directional button controls to change the position on the z axis too?
Check out the controls() function Help Page if you need help with the names of the controls! You can find it just here.
Functions and Keywords used in this Tutorial
clear(), controls(), drawObjects(), else, endIf, if, loop, placeObject(), printAt(), repeat, setLightPos(), setObjectMaterial(), setCamera(), then, update()